The camera was right. The world was wrong.
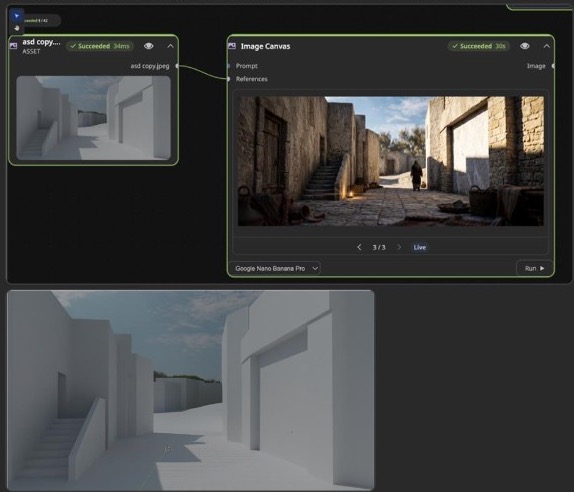
An AVS colleague had been experimenting with Blender as a reference source for AI-generated imagery and video. The camera angle and street layout were working, but the output still looked like a clean game environment rather than a believable photographic scene.
That distinction matters. A Blender blockout can define space, camera, and object placement, but it does not automatically carry material age, lens behavior, lighting logic, surface wear, local architecture, or photographic texture. The AI model sees the geometry. It still needs a separate explanation of what the world is made of.
The original failure mode
The conversation began with a familiar AI-production issue: even with cinematic prompting, the Blender-driven output stayed visually synthetic. The blockout supplied useful camera movement and street geometry, but the model interpreted the simplified surfaces too literally.
This is the core lesson: a geometry reference is not a texture reference. If the input is mostly clean forms and smooth grey walls, the model needs additional evidence to understand stone, plaster, dust, age, period construction, and photographic capture.
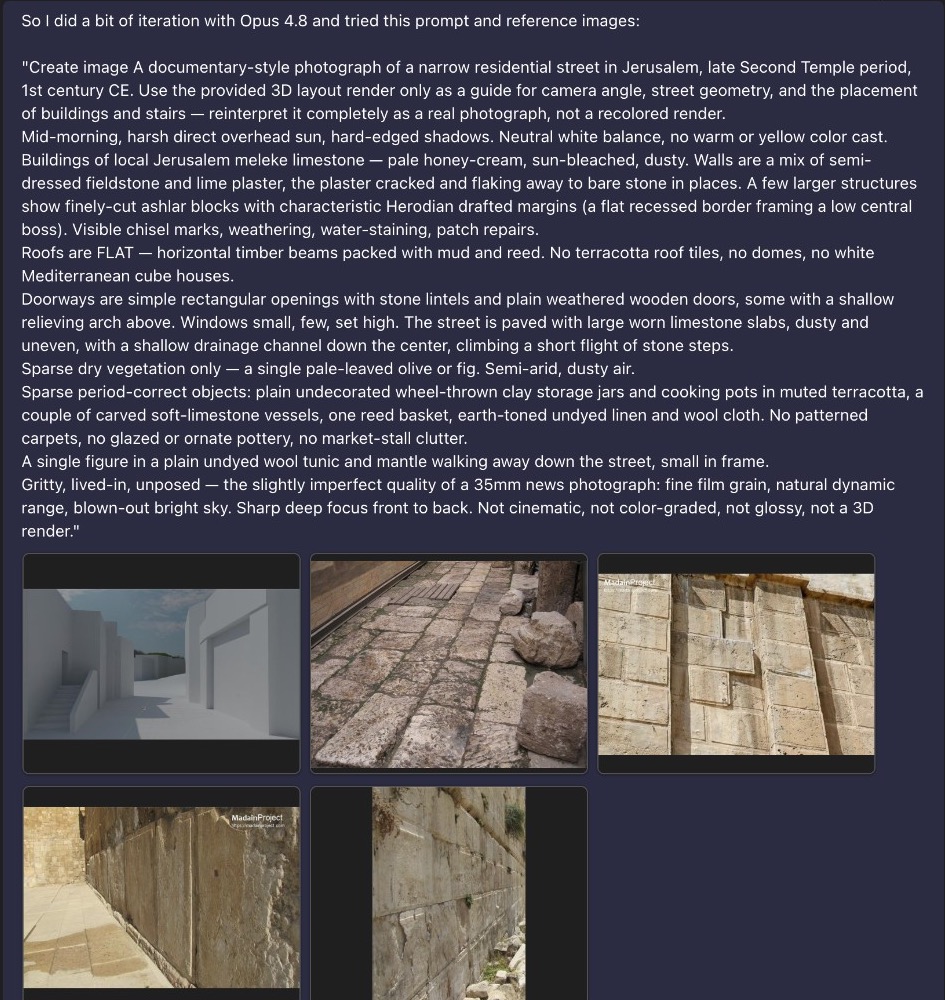
The revised prompt changed the role of each input.
The improved prompt did something subtle but important: it told the model to use the 3D layout only as a guide for camera angle, street geometry, and placement. Everything else was to be reinterpreted as a real photograph.
That one instruction prevented the model from copying the grey-box aesthetic. Then the prompt filled in the missing layers: limestone, plaster, chisel marks, weathering, flat roofs, plain openings, worn paving, sparse period-correct objects, dry air, harsh sun, and documentary photo texture.
Two models, same principle: separate layout from material evidence.
The final outputs are not identical, but both are materially more convincing than the grey-box-derived result. The street reads as a lived-in place because the model was given visual and textual evidence for stone, surface wear, lighting, architectural constraints, and photographic capture.
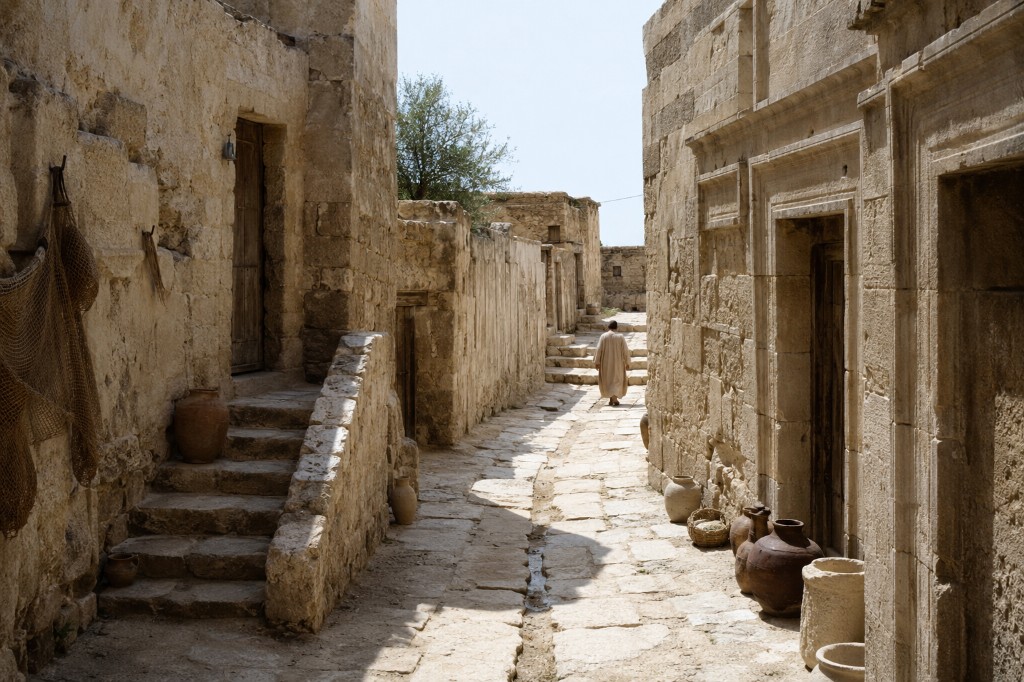
ChatGPT output
Stronger grit, deeper contrast, and more documentary texture. The scene feels heavier and less polished, with convincing surface wear and shadow falloff.
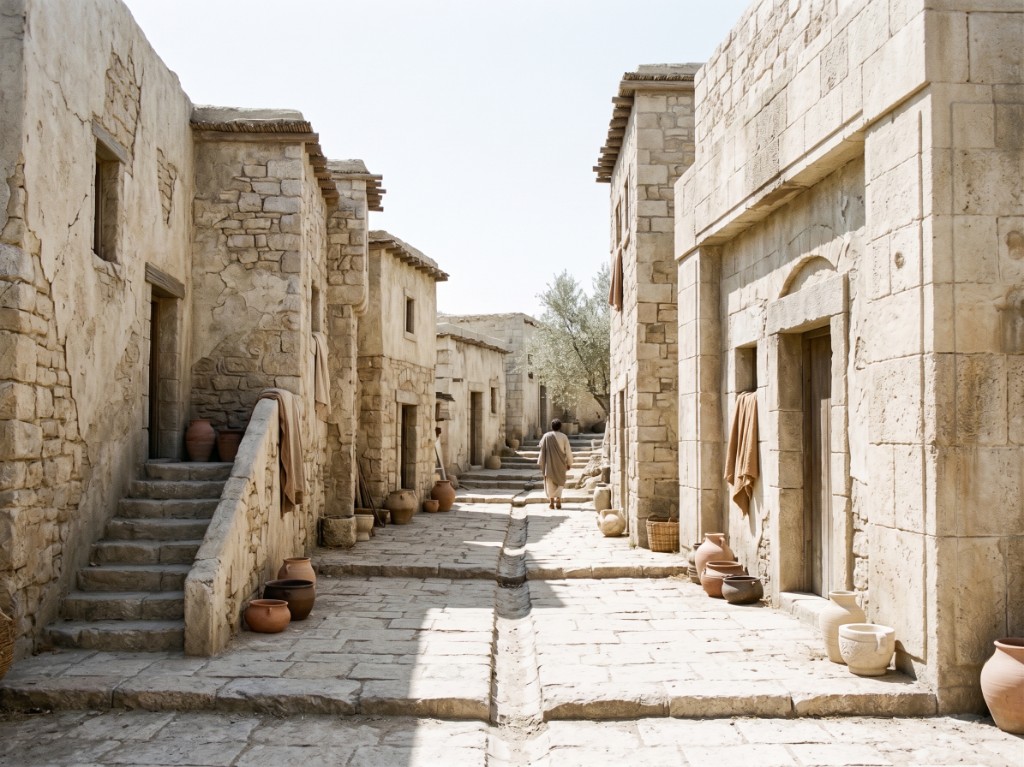
Gemini output
Cleaner architectural rhythm, brighter exposure, and more readable street geometry. The output keeps the layout while adding plausible stonework and props.
Inputs should have jobs.
The mistake in many AI-image and AI-video workflows is giving the model several references without explaining what each one is responsible for. In this case, the successful pattern was job assignment.
Geometry reference
Use Blender for camera angle, focal direction, path, spatial layout, object placement, and scene scale.
Material references
Use texture swatches and real-world photos for stone, plaster, road surface, weathering, fabric, props, and construction detail.
Capture instructions
Use lens, film stock, light direction, depth of field, exposure, and documentary style to define how the scene should be photographed.
The Ingredients-to-Video Pattern
The strongest phrasing from the conversation was that Blender's real help may be in "ingredients to video." That is the repeatable workflow: treat every input as an ingredient with a defined responsibility.
Build a simple Blender layout for camera path, perspective, scale, and major object placement.
Export stills, a short animation, depth, normals, outlines, or pose passes depending on the model workflow.
Collect surface references for stone, wood, fabric, road texture, wear, color, and local construction.
Tell the model exactly what each reference controls and what it should not copy.
Compare geometry, material realism, lighting, and period accuracy separately instead of judging only the overall image.
The useful prompt was not longer for its own sake. It was more separated.
The prompt worked because it separated five concerns that are often blended together: camera, world, materials, lighting, and exclusions.
Use the provided 3D layout only as a guide for camera angle,
street geometry, and placement of major forms. Reinterpret it
as a real photograph, not as a 3D render.

Define the place:
- Period, location, environment, construction logic

Define the materials:
- Stone, plaster, paving, wood, fabric, wear, dust, repairs

Define the capture:
- Lens, depth of field, light direction, grain, exposure, color

Define what to avoid:
- No modern materials, no glossy surfaces, no stylized color grade,
  no game-render look, no invented decorative elements
This is a useful pattern for AV because it mirrors production thinking. A shot is not one instruction. It is camera, set, material, light, wardrobe, props, lens, and finish.
The colleague's best prompt confirms the same direction.
The colleague's strongest result came from a prompt that named camera capture, lens behavior, film grain, contrast, light sources, color grade, and material setting. That prompt did not only describe the subject. It described the camera and the surface world.
The prompt's phrase "stone and plaster texture" is especially important. It points directly to the missing ingredient in the earlier Blender workflow: material evidence.

This is the practical meaning of control.
AI video control is often described in broad terms: better prompting, more references, stronger models, longer clips. This case study makes the concept concrete. Control improves when the model receives different kinds of evidence for different parts of the shot.
The principle: use 3D for geometry, references for material truth, prompt language for interpretation, and negative constraints for preservation.
That principle scales beyond this specific street scene. It applies to product shots, historical recreations, architecture, training environments, set extensions, visual explainers, and any AI video workflow where precise camera movement matters.
How to evaluate the next attempt
- Camera: Did the output preserve the intended angle, path, and parallax from the Blender guide?
- Geometry: Are the major forms in the right place, or did the model redesign the scene?
- Material: Do surfaces match the texture references, or do they still look like clean CG?
- Lighting: Is the light direction physically plausible and consistent across the shot?
- Period/detail: Did the model add modern or decorative elements that were not requested?
- Finish: Does it look photographed, rendered, illustrated, or over-polished?